Sunday, October 20, 2013

Halloween Cards

I have been on a halloween craft roll lately so I wanted to share some of the different cards I have been making.
First up, we have a simple card I made using the Cricut Mini Monster image. I love how the googly eyes gives him a little extra cuteness. I also cut the spider web using the same cart.

This next card was made using a digi stamp from Whimsiedoodles. The have the most adorable stamps in my opinion. 

Here is a tag.

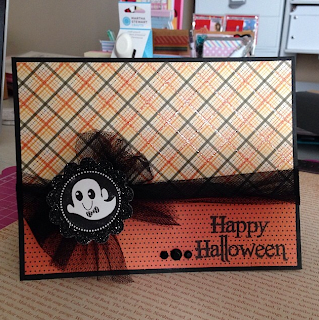
Last but not least is another simple card. I used tulle for the bow and it adds just the right touch.


Thanks for stopping by!

Saturday, October 19, 2013

Halloween Hand Sanitizer Gift Box

Here is a little hand sanitizer gift box that I made to give to my son's teacher. These boxes are so cute and very simple to make.

I found this idea on youtube and the channel is called chicnscratch. Here is the link http://www.youtube.com/user/ChicnScratch for anyone interested. She has lots of great ideas!

I did make a few adjustments to mine such as adding a little window and making the piece of cardstock slightly larger. I will include my video link which describes this in more detail. I also included the different things I used to make it.


Thanks for stopping by!

Thursday, May 9, 2013

Teacher Appreciation Gifts

Hello All!
This week is teacher appreciation week and I just wanted to share what I have been making for my youngest son's teachers. A paper was sent home last week with a list of what the theme for each day would be.

Monday, each student was supposed to write on a piece of paper why they thought their teacher was special.

Tuesday was bring a flower. I decided to make paper ones for Carson to bring in. Here is how they turned out...
All I did was take a piece of patterned carstock, fold it into thirds, cut strips halfway down and rolled it up. Then you just spread out the "petals" add a floral wire and floral tape and viola, a flower that will last forever. I also spritzed it with some glimmer mist to give it some sparkle.

Wednesday was "Pamper your teacher day". For this, I made each of his teachers homemade orange creamsicle sugar scrub and put it into 1/2 pint jars and decorated. Here is what they looked like...

Recipe for Orange Creamsicle Sugar Scrub

1 cup granulated sugar
1/2 cup oil (I used Olive Oil)
orange zest
vanilla extract
Mix all the ingredients together and place in jars.


Thursday was "You are sweet" day so I made each of the teachers Cake in a jar. Another simple project. Just bake a cake in a 13x9" pan. Let it cool. Take one of the jars and use it as a cutter to make perfectly shaped cake slices. Place one in the bottom of the jar. Add frosting. I used a piping bag. Add another slice and top with more frosting and sprinkles. Pop the lid on and decorate the jar however you want. :)

For tomorrow, the kids can send in whatever they would like. I've already started working on those gifts and will post about it tomorrow. Hope you enjoyed my little projects and thanks for stopping by!!

Tuesday, April 9, 2013

Back From Vacation and So Happy To Be Back In My Craft Room

If you follow my Instagram, you know that my family and I spent last week in Ft. Walton Beach, Florida. My oldest son Colton's high school baseball team was playing in a tournament down there.
We stayed at a condo right on the beach that had an amazing view of the Gulf and every night we got to fall asleep to the sounds of the waves. It was such a relaxing trip. It only rained one day that we were there, so I made that my shopping day..LOL

Here was our view

I did manage to find a couple of craft stores in the area. One was an AC Moore and the other a Scrapbook clearance store. AC Moore had a 25% off your entire purchase and the Scrapbook Clearance store was doing 50% off the ticketed price! Perfect shopping day!

Here were my finds from both stores:

AC Moore
 Scrapbook Clearance Store

After we checked out of the condo on Saturday, we headed up to Atlanta for the night. My husband got tickets for the Final Four game on Saturday night for himself and our middle son, Chandler. While they went to the game, the rest of us went to the mall and then to dinner.

The next morning we stopped at a couple more stores, TJ Maxx and Tuesday Morning where I found some more crafty goodies.


We got home late Sunday night and I was so happy to be able to get back into my craft room yesterday morning. I made some journaling tags for my project life which I will share in my next post.

Thanks so much for stopping by!!

Thursday, March 21, 2013

Switching to BlogLovin

Hey everyone, me again. Don't get too excited though this is just an information post. LOL. I just wanted to let everyone know that I am switching over from Google Reader to BlogLovin since they apparently are doing away with Google Reader. I'm not entirely sure what that means but since I see everyone else switching, I figured I might as well. If anyone can explain it better, please let me know.. =)


Follow my blog with Bloglovin

Easter Tags

Look at me on a roll with another blog post! I have two more projects to share that I worked on yesterday.
For every holiday I usually make my kids either a card or a tag to go along with a little goodie bag. Lately I have been making tags more than cards. I find it more fun for some reason, not exactly sure why..lol.

So first up is the tag I made for my daughter.
For this tag, the cute little bunny is from a digital kit I purchased online. I cut her out and added stickles to her hairbow and glossy accents to the egg to make it appear more shiny. I also popped her up with pop dots to give some dimension. I then added some background paper, washi tape and various ribbons and lace. Also some little glittery epoxy stickers that remind me of jelly beans.  I am so thankful that I had a least one girl that I could make girly frilly things for..lol.

This next one I made for one of my boys. I haven't decided which one yet. =)
Again, I used a digital image, various ribbons and washi tape and a button with twine. No frilly lace here. Sorry about the lighting on this one, I took this picture at night.

I still need to make two more, but they will look similar to the ones here as far as the image and embellishments that I use.

Thanks for stopping by!!

Tuesday, March 19, 2013

Recycled Projects

I wanted to share a little recycling project I did a few weeks back.  One of my favorite types of coffee drinks are the Starbucks Frappachino that come in the little glass bottles. I always save the bottles and the container they come in because I figured there must be something crafty I can do with them. Well lo and behold, two projects came to mind. For the first one, I took the bottles and cleaned them out really well and removed the stickers from the front and back of the bottles. Then I took the caps and spray painted them white. Added a few decorations and viola...
Instant (well sort of instant with a little work) Valentine Teacher gifts.  They were a hit with all my son's teachers.

The second project was to make something from the carrier that the bottles come in. So I took some gesso and covered the entire thing.

Then I covered it in different types of cardstock paper and added embellishments to make....a craft caddy to hold all my markers, pens and important crafting tools.
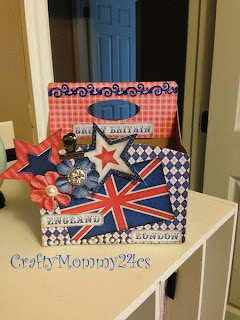
This one I did in an English/British theme.

And this one in a pink and girly theme. I love how both of them turned out. So before you throw out those bottles and boxes, give them a new purpose. Thanks for stopping by!!

Tuesday, February 26, 2013

An Angry Bird Birthday

Yesterday was my youngest son's 8th birthday. Hard to believe how fast time has flown by. He decided he wanted an Angry Birds theme for his party, so over the weekend we set off to the party store to get supplies.

When we got there, I went straight to the kids section and was immediately disappointed because I did not see any Angry Bird items whatsoever. Tons of Mickey Mouse, Barbie and of course my favorite, Hello Kitty, which I stared at longingly before I snapped back into reality and my reason for being there. So Carson and I continued looking through the store until we got to the back corner of the store and lo and behold there were the Angry Bird items.

We got the usual party supplies; plates, napkins, tablecloth, table decoration and the blower thingys. Carson really wanted a banner too but I just couldn't see spending $7 for something we would only use one time.  I told him I would make one for him myself. I will get to that in a moment.

We purchased the items and then headed home. The first thing I got started working on were his class treats and goodie bags.

I wanted to keep it Angry Bird themed so I decided to do pig cookies. Not the regular pink kind of pigs but the green silly looking pigs. I remembered I had a bear shaped cookie cutter that would be perfect for the face shape. I set to work making my usual butter cookie recipe and icing made from powdered sugar and tinted green.

Here is how the cookies turned out...


Pretty cute right?! I used the Wilton brand eyeballs and black gel for the snout and eyebrows. Carson loved them!

After I finished with the cookies, I got started on the goodie bags. I found some free online printables of Angry Birds and cut them out and added them to some scalloped circles that I outlined with faux stitching. I decided just to do candy instead of buying the little toys that are usually included in goodie bags.

Here is how they turned out....


Close up of a bag...


Yesterday morning, we took the cookies and bags into school where the kids all proceeded to ooh and ahh over them. Confirmation of a job well done...=)

When I got home, I got started on the cake. I wanted to wait until Carson was at school so that he would be surprised when he got home and saw it.  I made a two layer chocolate cake with my homemade buttercream frosting which I colored brown to make it look like dirt.

Here is the fabulous cake:


I used the frosting tip with all the tiny holes, not sure of the name..lol, to make the top look like grass. The birds and pigs are from a game that my son had received for Christmas but had not yet opened and the "blocks" are sugar wafers. I think it turned out pretty great.

Finally I set the table up with all the decorations.


You see that banner hanging on the wall? I found another printable online which I cut out and then added to yarn to make my very own banner. It was a free printable, thus saving me $7. Pretty thrifty of me, I must say.

When Carson got home, he was over the moon happy at the set up and loved the cake. He had a great birthday and his smile was worth all the work that went into it.

Thanks for stopping by!